Introducing our captivating Image Carousel, which showcases a complete collection of all the fascinating items we have on board our boat. The tabs provided below expertly break down each individual lure, detailing not only its specific name but also offering insights into how each one is effectively used in various fishing scenarios.

















Summary
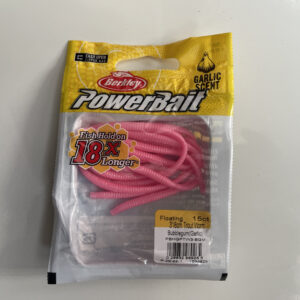
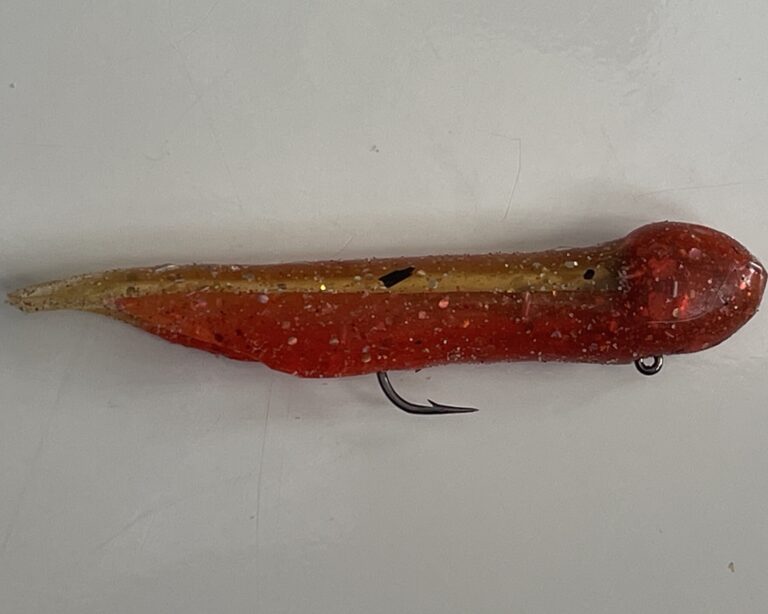
This is a soft plastic lure, likely rigged on a jig head, designed for mimicking baitfish or other prey. Here’s how and where to use it:
How to Use
-
Casting and Retrieval:
- Cast it into the water and allow it to sink to the desired depth (near the bottom, mid-water, or shallow).
- Retrieve it with a steady or variable speed to mimic natural swimming.
- Add occasional pauses or twitches to make it look like an injured or fleeing prey.
-
Dragging Along the Bottom:
- Slowly retrieve the lure along the bottom to stir up sediment and attract bottom-feeding species like redfish, flounder, or grouper.
- Best for species that target prey on the seafloor.
-
Vertical Jigging:
- Drop the lure straight down and bounce it gently up and down, imitating a small creature hopping along the bottom.
- This technique works well for deepwater fishing.
Where to Use
-
Saltwater:
- Inshore flats, near mangroves, or over seagrass beds for species like redfish, trout, or snook.
- Near structures like docks, piers, or reefs for predatory fish.
- Coastal areas with sandy bottoms or rocky edges.
-
Freshwater:
- In lakes, ponds, or rivers for bass, walleye, or pike.
- Near underwater vegetation, fallen logs, or rocky areas where fish might hide.
When to Use
- The reddish and golden color with speckles imitates crustaceans or small fish, making it particularly effective in low-light conditions, murky water, or during dawn and dusk when fish are actively hunting.
This versatile lure can attract a wide variety of predatory fish in different environments.
Summary
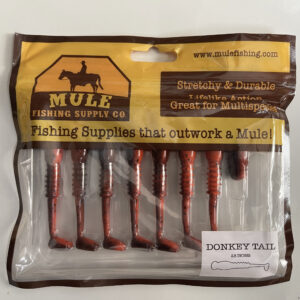
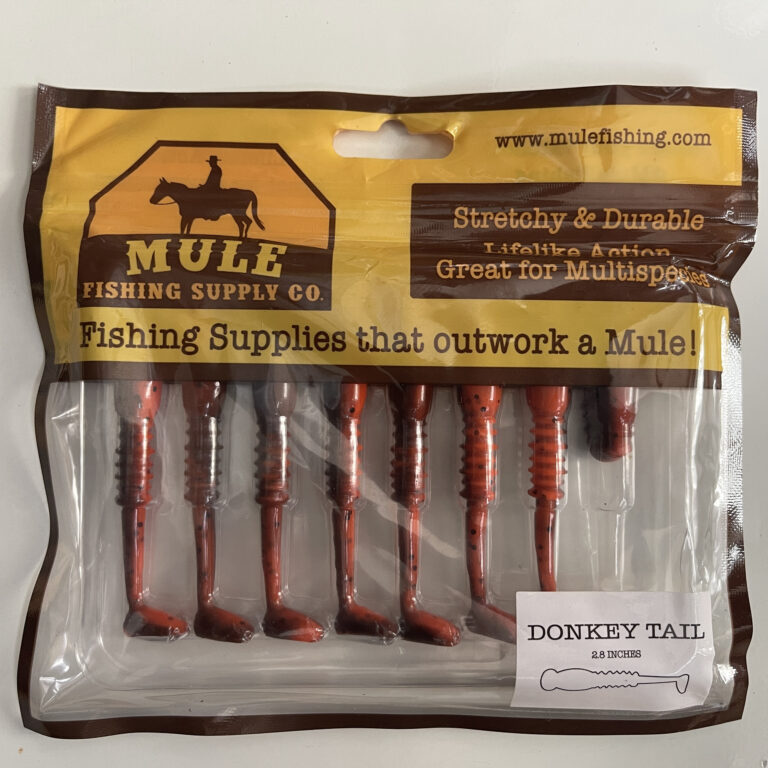
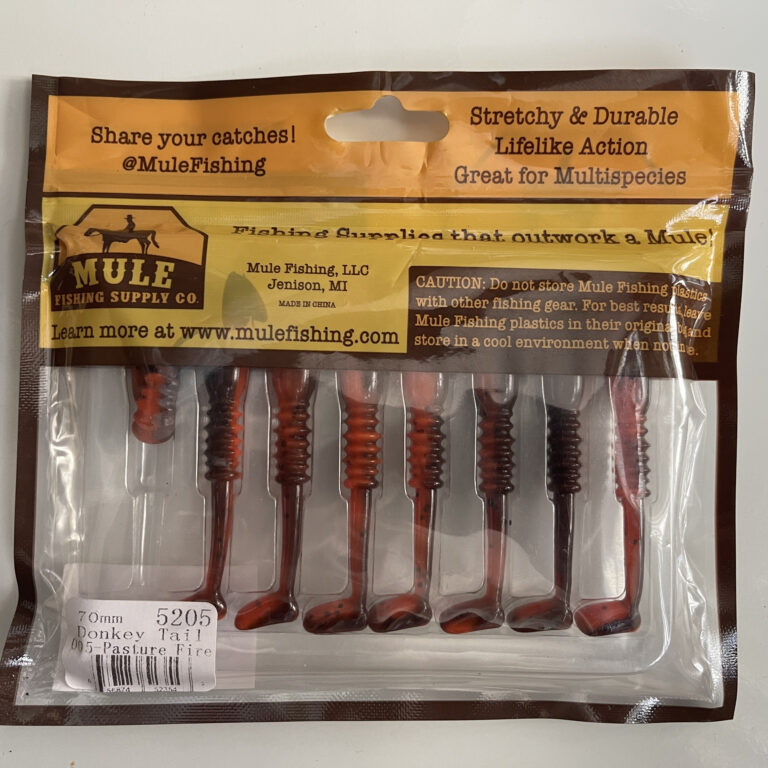
This package contains “Donkey Tail” soft plastic paddle tail lures from Mule Fishing. These lures are versatile and designed for multi-species fishing, including bass, crappie, trout, and panfish. Here’s how and where to use them:
How to Use
-
Rigging Options:
- Jig Head: Pair the paddle tail with a small jig head (1/16 oz to 1/4 oz, depending on depth and current). Thread the lure onto the hook, ensuring it sits straight for optimal swimming action.
- Drop Shot: Attach the lure to a drop-shot rig for precise depth control, great for finesse fishing.
- Spinnerbait Trailer: Use it as a trailer on a spinnerbait or chatterbait to add extra action and appeal.
-
Retrieve Techniques:
- Steady Retrieve: Cast the lure and reel it in at a consistent speed. The paddle tail will create a natural swimming motion.
- Bounce Along the Bottom: Let the lure sink to the bottom, then lift your rod tip slightly and let it fall, mimicking a baitfish or small creature.
- Twitch and Pause: Retrieve with intermittent rod twitches to imitate an injured or fleeing baitfish.
-
Finesse Approach:
- Use a slower presentation for pressured fish or during colder water conditions.
Where to Use
-
Freshwater:
- Lakes and Ponds: Around docks, submerged vegetation, or rocky areas.
- Rivers and Streams: In current seams, eddies, or near drop-offs.
- Shallow Flats: For panfish or bass, especially during spawning seasons.
-
Saltwater (Inshore):
- Near seagrass beds, mangroves, or sandy flats for species like redfish, snook, or trout.
Why It’s Effective
- The paddle tail creates vibration and movement, attracting fish through both sight and sound.
- The compact size (70mm) and durable material make it ideal for targeting a wide range of species.
Keep these lures in their original packaging and out of direct sunlight to preserve their durability and stretchiness.
Summary
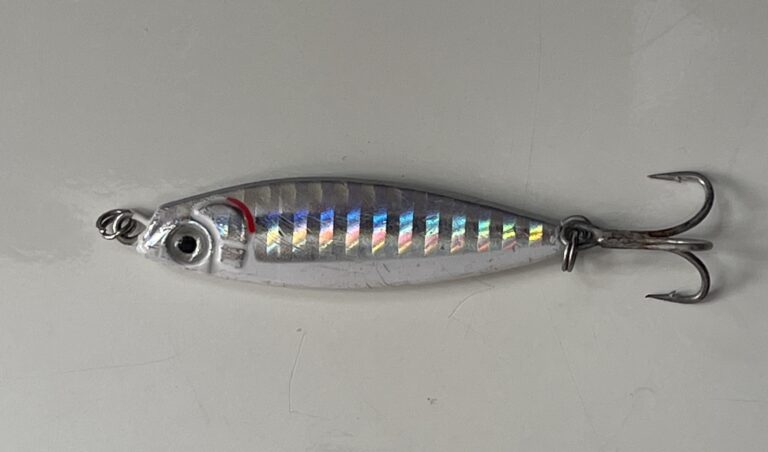
This is a metal jigging lure, commonly used for saltwater fishing, particularly for species like mackerel, snapper, tuna, or small pelagics. Here’s how and where you can use it:
How to Use
-
Casting and Retrieval:
- Cast the lure into the water near fish-holding areas such as reefs, drop-offs, or bait schools.
- Use a high-speed retrieve to mimic a fleeing baitfish.
- Add erratic jerks during retrieval to create a fluttering motion that attracts predatory fish.
-
Vertical Jigging:
- Drop the lure straight down to the desired depth near the bottom or midwater column.
- Use a jigging motion by lifting your rod tip sharply and then letting the lure fall, imitating a dying fish.
- Experiment with the speed and rhythm to find what triggers bites.
-
Slow Pitch Jigging (Optional):
- Ideal for deepwater areas.
- Use controlled, slow lifts of the rod to let the lure flutter as it sinks.
Where to Use
-
Saltwater:
- Near reefs, wrecks, or underwater structures where fish hunt smaller prey.
- In open water around schools of baitfish or diving seabirds.
- Tidal rips, channels, or drop-offs where predatory fish patrol.
-
Freshwater (less common):
- Can be used in deep lakes or reservoirs for larger predatory fish, like lake trout or pike, mimicking a wounded baitfish.
Summary
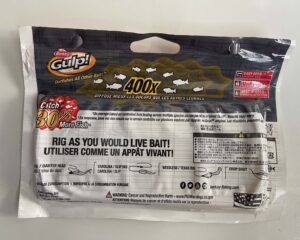
Gulp! Alive! baits offer the best alternative to live bait ever produced. Since the baits are soaked in the powerful attractant they are more effective and catch more fish. Put the bait back in the jar to ReCharge its effectiveness. You don’t have to deal with the hassle of live bait anymore try Gulp! Alive! and fish the revolution. Features: – Each bait has a natural presentation in action, scent, and taste – Replaces live minnows for better durability and long lasting results – Expand your strike zone with 400x more scent dispersion than plastic baits – 15 years of Gulp! evolutionthe best keeps getting better Specifications: – Bait Length: 3″ – Color: Assorted – Weight: 11. 20 oz
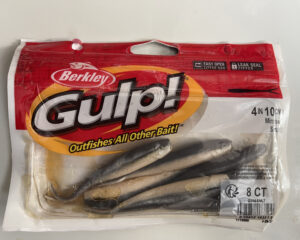
The Berkley Gulp! Minnow (as shown in your image) is a soft plastic bait designed to mimic the movement and appearance of small baitfish. Here’s how and when to use it:
How to Use the Berkley Gulp! Minnow
-
Rigging:
- Jighead: Attach the minnow to a jighead for casting and vertical jigging. Choose a jighead weight based on water depth and current strength.
- Drop Shot: Use a drop-shot rig for a subtle presentation, especially effective in clear water or when targeting finicky fish.
- Spinnerbait Trailer: Attach it to a spinnerbait or chatterbait as a trailer to add extra movement and scent.
- Texas or Carolina Rig: Use these rigs to target fish near the bottom, especially in weedy or rocky areas.
-
Retrieval Techniques:
- Slow and Steady Retrieve: Mimics a swimming baitfish, ideal for calmer fish that aren’t actively chasing.
- Twitch and Pause: Impart short jerks with pauses to imitate an injured or fleeing baitfish.
- Vertical Jigging: Drop the bait to the desired depth and lift it slightly before letting it fall, perfect for targeting suspended fish.
-
Enhance the Presentation:
- The Berkley Gulp! is infused with scent and flavor that disperses in the water, attracting fish. Be sure to store it in its original packaging to retain these properties.
When to Use the Berkley Gulp! Minnow
-
Target Species:
- Excellent for bass, walleye, crappie, trout, and other predatory species.
- Saltwater varieties can attract species like redfish, flounder, and speckled trout.
-
Conditions:
- Clear Water: The realistic design works well in clear water where fish rely on sight.
- Murky Water: The scent dispersion helps attract fish in low-visibility conditions.
- Cold Water: Fish are less active in colder water, so a slow presentation with this bait can entice them.
-
Season:
- Effective year-round but particularly productive in spring and fall when fish are feeding heavily on baitfish.
-
Situations:
- When fish are being finicky and not responding to hard baits or other lures.
- Around structures like docks, rocks, and weed lines where baitfish gather.
By following these tips, you can maximize the effectiveness of your Berkley Gulp! Minnows and enjoy more productive fishing outings.
Summary
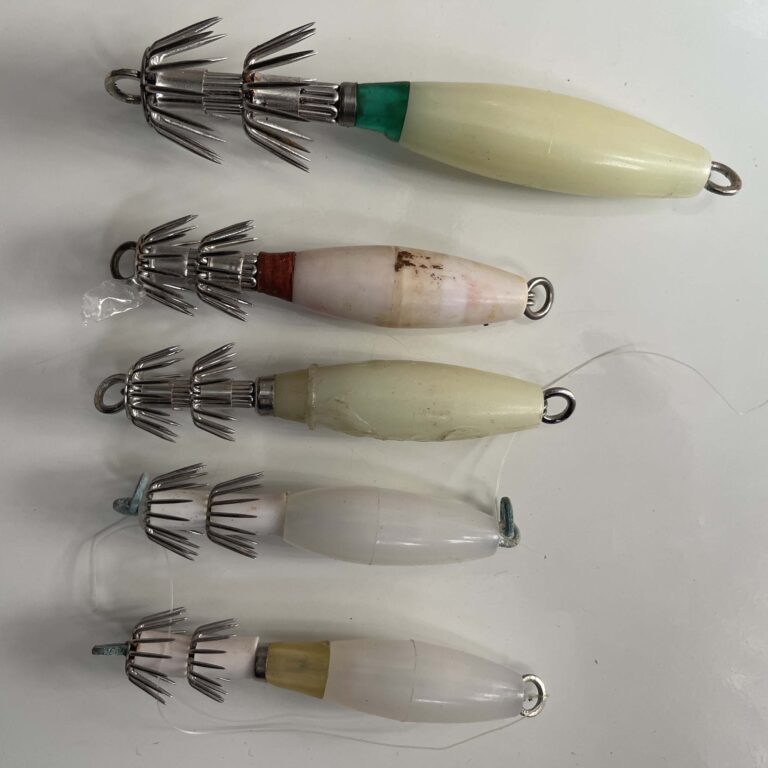
These are squid jigs, specialized lures designed for catching squid. They feature multiple sharp hooks (crown-style) at the bottom and a weighted or luminous body, making them effective in attracting and capturing squid.
How to Use Squid Jigs
-
Attach to the Line:
- Use a swivel to attach the jig to your fishing line to prevent line twist.
-
Fishing Techniques:
- Vertical Jigging:
- Drop the squid jig straight down until it reaches the desired depth, typically near the bottom or where squid are schooling.
- Use an upward jerk or lift-and-fall motion to mimic the movement of a small fish or shrimp.
- Slow Retrieval:
- Cast out the jig and slowly retrieve it while adding small jerks to create lifelike movement.
- Suspending:
- If the water is deep, suspend the jig at a specific depth using a float or multiple jigs to cover different depths.
- Vertical Jigging:
-
Lighting and Attraction:
- These jigs are often glow-in-the-dark or brightly colored to attract squid, especially at night or in murky water. Charge the glow feature with a flashlight before use.
-
Best Practices:
- Keep tension on the line when a squid grabs the jig to prevent it from escaping.
- Be gentle when reeling in, as squid can let go if the tension is inconsistent.
Where to Use
-
Saltwater Locations:
- Harbors and Piers: Squid often gather near light sources at night.
- Coastal Waters: Around kelp beds, rocky reefs, or drop-offs.
- Offshore: Near floating objects or structures where squid feed.
-
Times:
- Nighttime: Squid are most active at night, particularly in areas illuminated by artificial lights.
- Tidal Changes: Squid are more active during incoming tides.
Why These Work
- The hooks are designed to grab the squid’s tentacles securely.
- The jig mimics the size and movement of prey, and the glow feature draws squid in low-light conditions.
These are excellent for targeting species like calamari and other squid varieties commonly used as bait or for cooking!
Summary
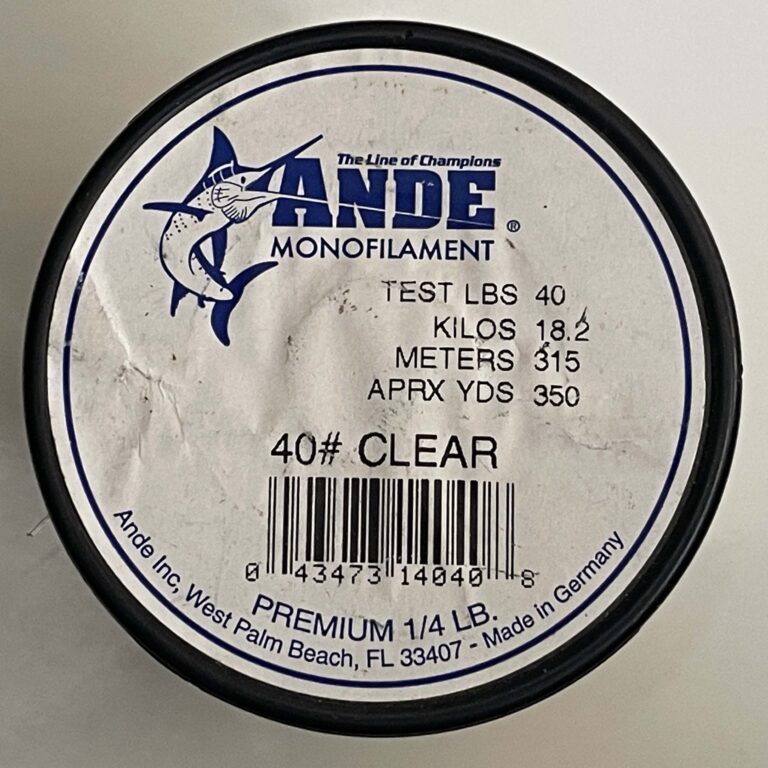
This is a spool of Ande Monofilament Fishing Line with a 40-pound test strength, meaning it can handle up to 40 pounds of tension before breaking. It is a clear, general-purpose monofilament line suitable for a variety of fishing applications. Here’s how and where to use it:
Uses of 40-Pound Monofilament Line
-
Saltwater Fishing:
- Ideal for targeting medium to large-sized saltwater species such as:
- Snapper, Grouper, Tarpon, Kingfish, Mahi-Mahi, and other pelagic or reef fish.
- Strong enough to handle the resistance of large fish and the abrasive underwater environments like reefs and rocks.
- Ideal for targeting medium to large-sized saltwater species such as:
-
Freshwater Fishing:
- Suitable for large species such as:
- Catfish, Musky, Sturgeon, or large Striped Bass in freshwater lakes and rivers.
- Suitable for large species such as:
-
Trolling:
- Great for trolling lures or bait offshore for species like Tuna, Marlin, or Wahoo due to its abrasion resistance and high tensile strength.
-
Leader Material:
- Can be used as a leader for lighter lines in situations where fish have sharp teeth or you need additional abrasion resistance, such as for Bluefish or Barracuda.
Characteristics of Monofilament Line
- Stretch:
- Provides shock absorption, making it forgiving during sudden runs or jumps by fish.
- Abrasion Resistance:
- Durable against rough surfaces like rocks, barnacles, or coral.
- Visibility:
- Clear monofilament is less visible underwater, making it effective in clear water conditions.
Best Practices
- Reels:
- Can be spooled onto spinning, baitcasting, or conventional reels depending on the type of fishing.
- Knots:
- Use strong knots like the Palomar Knot or Improved Clinch Knot to secure hooks and lures.
- Conditions:
- Perform well in a variety of conditions but may weaken slightly in direct sunlight over time. Replace periodically to avoid line degradation.
Summary
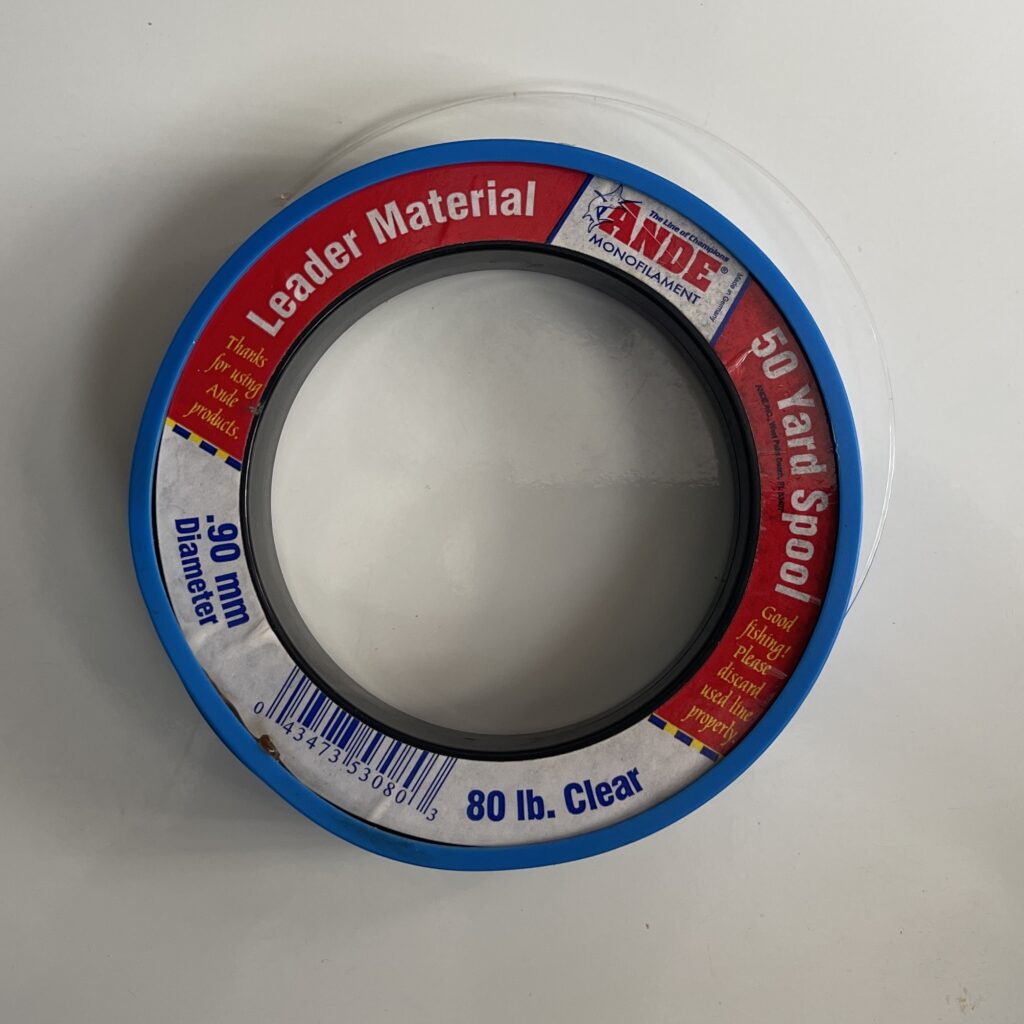
The spool in the image is Ande Monofilament Leader Material, with an 80-pound test strength and a diameter of 0.90 mm. Leader material is specifically designed to withstand abrasion, stress, and the sharp teeth or rough surfaces you may encounter when fishing. Here’s how and where to use it:
Purpose of Leader Material
-
Abrasion Resistance:
- Protects against rough underwater surfaces such as rocks, coral reefs, and the sharp edges of a fish’s mouth.
- Ideal for species like Barracuda, Grouper, Snapper, Tarpon, or Sharks.
-
Stealth:
- Clear monofilament leader is less visible in water, making it great for line-shy fish in clear water conditions.
-
Shock Absorption:
- Reduces the impact of sudden movements when a fish strikes or makes a strong run.
-
Prevents Line Damage:
- Shields the main fishing line from being cut or frayed during fights with fish.
How to Use Leader Material
-
Attach to Main Line:
- Use a strong knot or connection such as:
- Albright Knot
- Double Uni Knot
- Swivel with a knot for easy attachment/detachment.
- Use a strong knot or connection such as:
-
Length of Leader:
- Typically, use 1-3 feet for inshore fishing or longer (4-10 feet) for offshore fishing.
- Adjust based on the target species and environment.
-
Attach Hook or Lure:
- Tie the leader material directly to the hook, lure, or jig using a knot such as the Improved Clinch Knot or Loop Knot (for better lure action).
-
As a Top Shot:
- Combine with braided or lighter monofilament lines for trolling or bottom fishing setups.
Best Situations for 80-Pound Leader Material
- Saltwater Fishing:
- Perfect for trolling, jigging, or casting inshore or offshore for large fish species.
- Heavy-Cover Environments:
- Excellent in areas with lots of structure (reefs, rocks, wrecks) or sharp-toothed predators.
- Big Game Fishing:
- Commonly used in setups for tuna, sailfish, wahoo, or similar large species.
Tips for Usage
- Storage:
- Keep it in a cool, dry place to prevent UV damage.
- Check for Damage:
- Inspect leader material for nicks or abrasions and replace as needed.
- Pair with Appropriate Tackle:
- Ensure your reel and rod setup matches the strength of the leader.
This material ensures your fishing gear holds up against challenging conditions and strong fish!
Summary
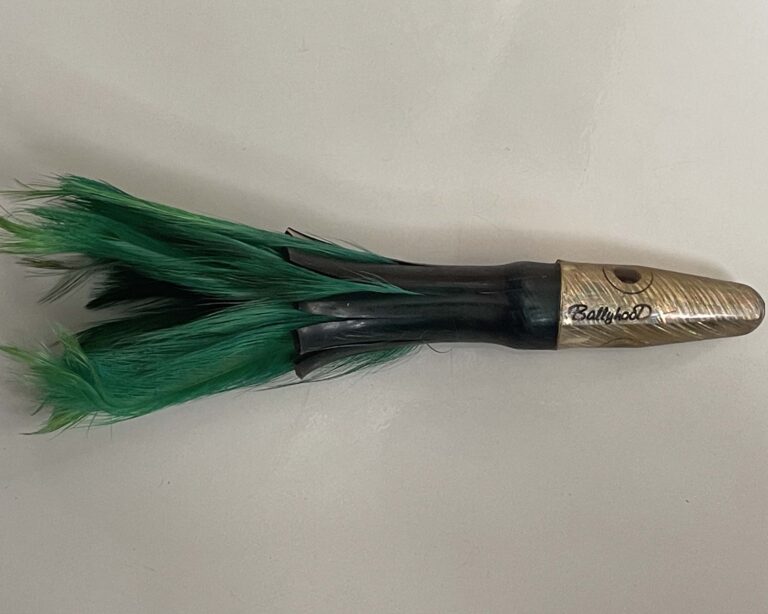
This lure, labeled “Ballyhood,” is a feather trolling lure designed for offshore saltwater fishing. It is particularly effective for targeting fast-moving pelagic gamefish. The green and black coloration, coupled with the feathered skirt, imitates baitfish or squid, making it a versatile and enticing option.
Purpose of the Lure
This trolling lure is commonly used to catch:
- Tuna (Yellowfin, Bluefin, etc.)
- Mahi-Mahi (Dorado)
- Wahoo
- Marlin
- Sailfish
How to Use This Lure
-
Rigging:
- Hook Setup: Rig it with a strong single hook or double-hook rig. Use heavy monofilament or fluorocarbon leaders (80-200 lb test) to prevent cut-offs from toothy fish like Wahoo.
- Bait Option: You can enhance this lure by adding a ballyhoo (rigged natural bait) underneath the skirt for added scent and realism.
-
Trolling:
- Attach the rigged lure to your trolling setup, securing it with a swivel.
- Troll the lure at a moderate speed (6-12 knots), depending on the target species.
- Position it as part of a spread (e.g., in the long or short rigger position) to cover a wide area and create a natural presentation.
-
Adjust for Depth:
- Use trolling weights or planers if you want the lure to run deeper, particularly for species like Wahoo that often strike below the surface.
Where to Use This Lure
- Offshore Waters:
- Ideal for open water, near drop-offs, underwater structures, and seamounts.
- Weed Lines and Floating Debris:
- Troll near weed lines, flotsam, or sargassum mats where baitfish gather.
- Migration Routes:
- Fish along known migratory paths for pelagic species, often near current edges or temperature breaks.
Why It Works
- The feathered skirt produces lifelike movement and visual appeal, simulating a fleeing baitfish.
- The green and black coloration mimics common prey like squid and flying fish, particularly in clear or slightly tinted water.
- The head design allows the lure to create a bubble trail, adding vibration and visibility to attract predators.
Pro Tip: Use this lure during calm to moderately rough conditions. Its streamlined design ensures it performs well without tangling or skipping out of the water. Pair it with a teaser or spreader bar to increase visibility and attract fish from a distance.
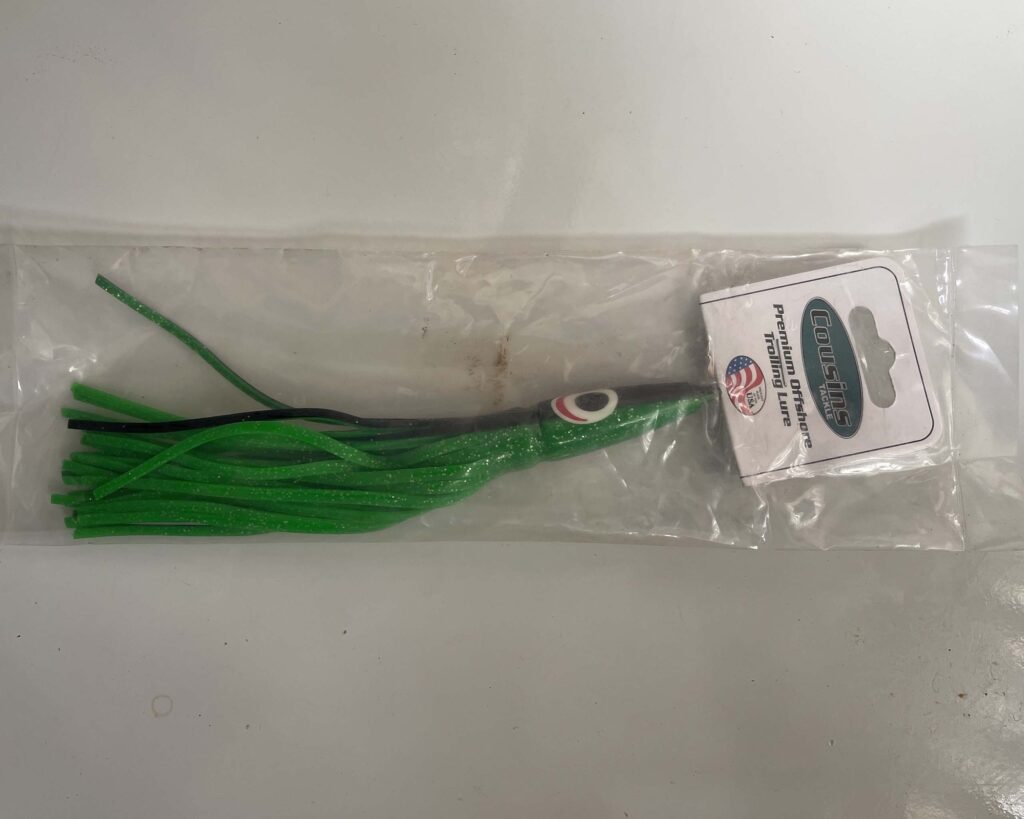
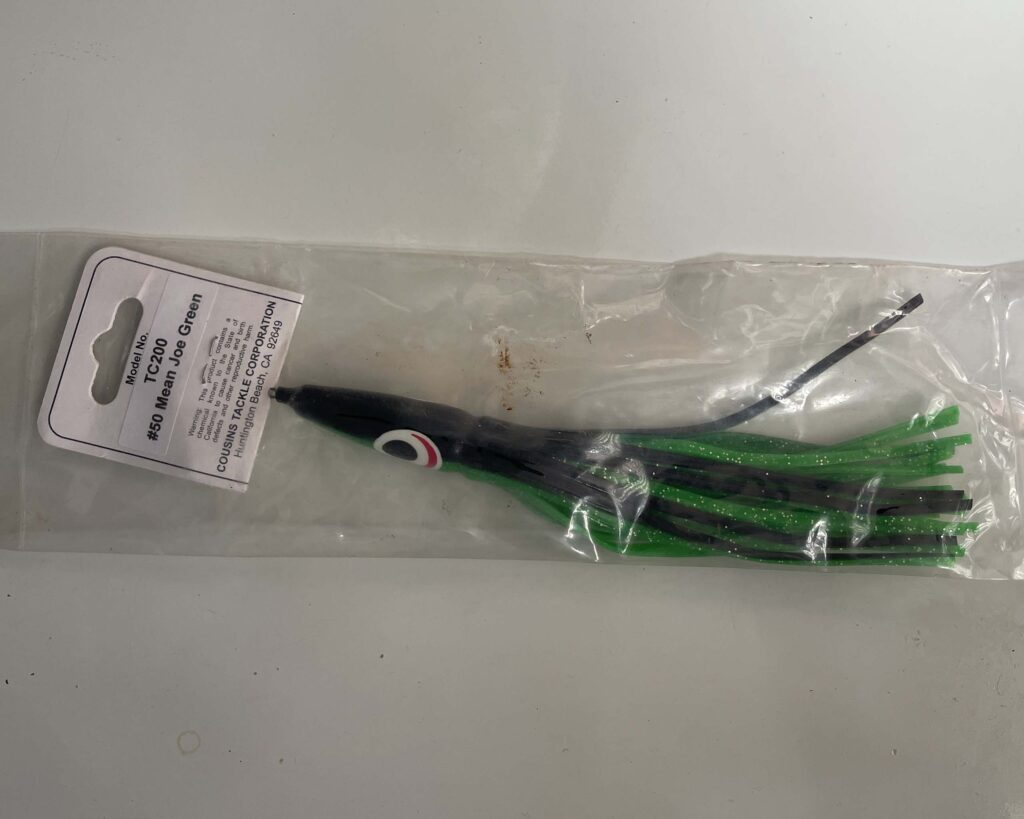
Summary
This lure, labeled as “Mean Joe Green” and produced by Cousins Tackle Corporation, is a trolling skirt lure, commonly used in saltwater fishing. Here’s how and where you would use it:
Purpose of the Lure
This lure is designed for targeting pelagic gamefish species, such as:
- Tuna (Yellowfin, Bluefin, etc.)
- Mahi-Mahi (Dorado)
- Wahoo
- Marlin
- Sailfish
Its vibrant colors, glitter, and streamlined design mimic the movement and appearance of baitfish or squid, enticing predatory fish to strike.
How to Use This Lure
-
Rigging:
- Use a strong monofilament or fluorocarbon leader (e.g., 80-150 lb test).
- Rig it with a hook or a hookset, often a single J-hook or a double-hook rig, depending on the species targeted.
- Optionally, pair it with a trolling weight or planer to control depth.
-
Trolling:
- Attach the rigged lure to your main line via a snap swivel.
- Troll the lure behind the boat at varying distances (generally 10-30 feet behind) to create the illusion of fleeing prey.
- Adjust trolling speed based on your target species:
- Wahoo: Faster speeds (10-15 knots)
- Tuna or Mahi-Mahi: Moderate speeds (6-10 knots)
- Marlin or Sailfish: Slower speeds (4-8 knots)
-
Spread Setup:
- Use it as part of a trolling spread, mixing different lures and baits to increase attraction.
- Position the “Mean Joe Green” in the outrigger or as a flat line lure for maximum visibility.
Where to Use This Lure
This type of trolling skirt is versatile and effective in various saltwater environments:
- Offshore Fishing:
- Over deep water, near structures such as drop-offs, seamounts, and underwater canyons where pelagic fish hunt.
- Around Floating Debris or Weed Lines:
- Fish often gather near floating objects and sargassum weed lines.
- During Migration Seasons:
- When pelagic species are moving through a region, this lure is perfect for targeting them.
Why It Works
- The green and black coloration resembles squid or small baitfish, a favorite prey for many pelagic fish.
- The soft skirt moves naturally in the water, mimicking the undulating motion of prey.
- The design minimizes drag, allowing for smooth trolling.
Pro Tip: Use it with a teaser or daisy chain to create more commotion in the water, further attracting gamefish to the area.
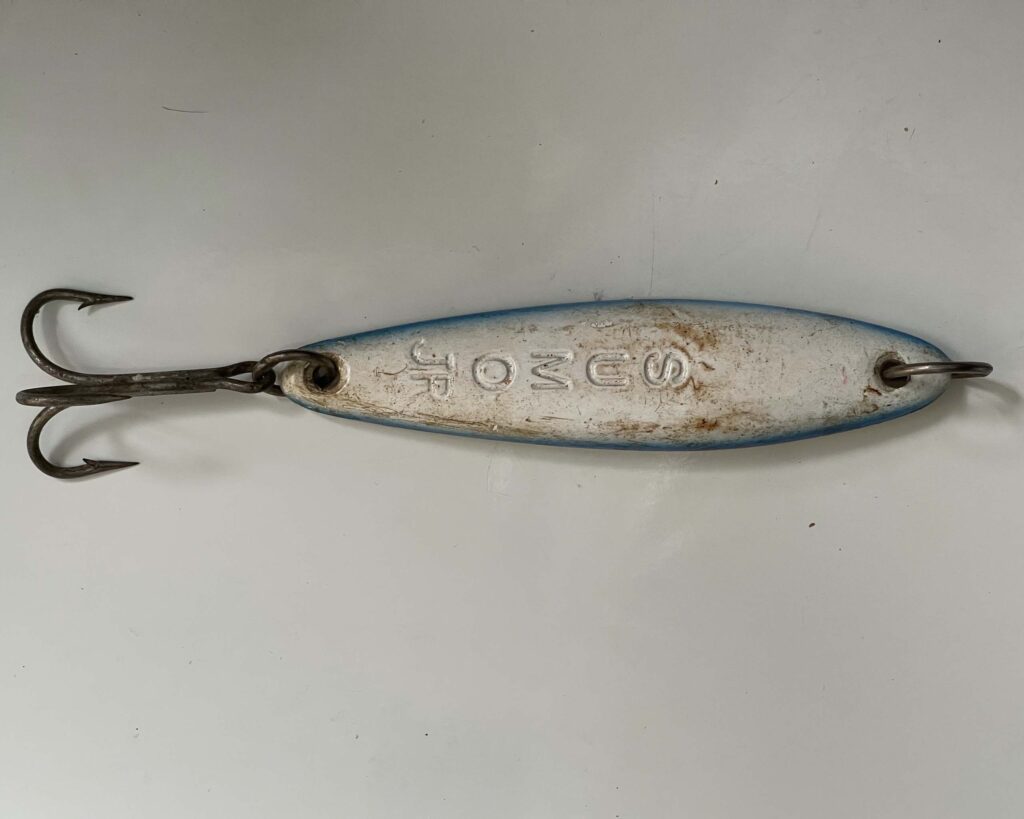
Summary
This is a metal spoon lure, commonly referred to as a “casting spoon” or “jigging spoon.” It is versatile and effective for both saltwater and freshwater fishing, designed to mimic the appearance and erratic movement of a small baitfish, which is attractive to predatory fish.
How to Use This Lure
Casting and Retrieval:
- Attach to Line:
- Use a strong swivel or loop knot to reduce line twist caused by the spinning action of the lure.
- Casting:
- Cast the lure out and allow it to sink to the desired depth (depending on the target fish species).
- Retrieve:
- Use a steady or erratic retrieval method to make the spoon dart and flutter, simulating an injured baitfish.
- Add pauses during retrieval to let the spoon sink and flutter, which can trigger strikes from opportunistic fish.
Vertical Jigging:
- Drop the spoon to the bottom or the depth where fish are detected.
- Jig it vertically by lifting your rod tip sharply and letting the spoon fall back, allowing it to flutter.
- Repeat the process while monitoring for strikes during the fall, as many fish hit the lure at this point.
Where to Use This Lure
Freshwater Applications:
- Target Species:
- Pike, Bass, Walleye, Trout
- Ideal Locations:
- Near weed beds, rocky structures, drop-offs, or deeper areas where predatory fish hunt.
Saltwater Applications:
- Target Species:
- Bluefish, Striped Bass, Mackerel, Redfish, Snook
- Ideal Locations:
- Near jetties, reefs, or open water where baitfish schools are present.
- Effective for surf casting or nearshore fishing.
Why It Works
- The metallic finish reflects light, mimicking the flash of a fleeing baitfish.
- The heavyweight design allows for long casts, deep sinking, and effective presentation in strong currents or deep water.
- The erratic fluttering action when retrieved or jigged triggers predatory instincts.
Pro Tip: Maintain sharp hooks, as fish often strike spoons aggressively but may not stay hooked if the treble hooks are dull. Consider upgrading the hooks for stronger saltwater-resistant ones if you’re targeting larger species.
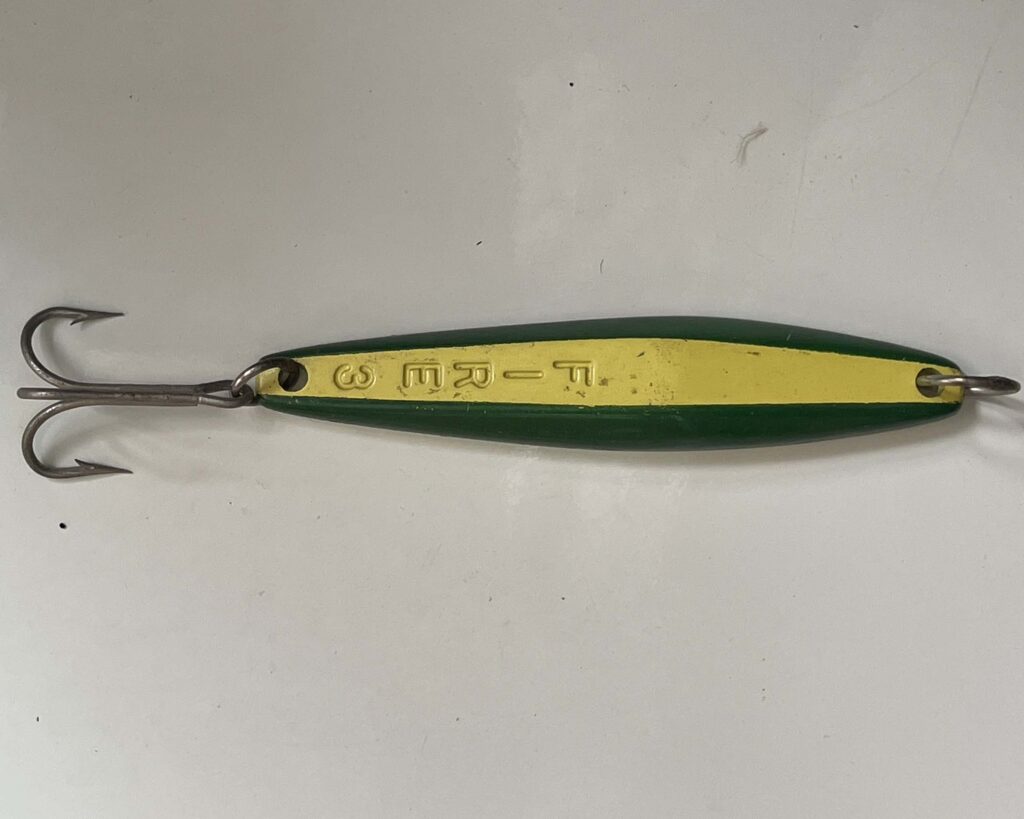
Summary
This is another metal spoon lure with a streamlined design and a two-tone green and yellow color scheme. It’s similar to the previous spoon lure but offers a different color pattern that can be particularly effective in specific conditions and for certain species of fish.
Fire 3 Purpose
The term “Fire 3” on this metal spoon lure likely represents a specific color or design pattern used by the manufacturer. Many fishing lure companies label their lures with names or codes that correspond to particular color schemes or finishes. In this case:
-
“Fire” could refer to a bright, flashy, or bold color scheme, possibly imitating the hues of fire or heat (like reds, yellows, or oranges). It might also suggest that the lure is designed to be highly visible in certain water conditions.
-
“3” could denote the third variation in a series of similar designs or sizes. Manufacturers often release multiple patterns or models, and the number helps differentiate them.
Why It’s Important
- Color/Pattern Relevance: Some patterns or colors are more effective for specific fish species or water conditions. For example, bright “fire”-type colors might be better in murky water or overcast conditions where visibility is low.
- Size Identification: If “3” refers to the size of the lure, it helps anglers select the appropriate size for the fish they’re targeting (smaller sizes for smaller species and larger sizes for big game fish).
If you want to confirm its exact meaning, checking with the manufacturer’s catalog or website could provide more detailed information.
Where to Use This Lure
Freshwater Applications:
- Target Species:
- Pike, Bass, Walleye, Trout, Muskie
- Ideal Locations:
- Lakes, rivers, or reservoirs with underwater structures like logs, rocks, or weed beds.
- Deep water during colder months where fish tend to hold lower.
Saltwater Applications:
- Target Species:
- Mackerel, Bluefish, Striped Bass, Redfish
- Ideal Locations:
- Coastal waters, surf zones, or jetties.
- Effective for nearshore reefs and sandbars.
How to Use This Lure
Casting and Retrieval:
- Attach to Line:
- Use a swivel or loop knot to minimize line twist caused by the spinning action.
- Casting:
- Cast the lure into areas where fish are feeding or hiding, such as near drop-offs, weed beds, or baitfish schools.
- Retrieve Techniques:
- Steady Retrieve: Maintain a consistent speed to make the lure swim naturally.
- Stop-and-Go Retrieve: Pause occasionally during retrieval to allow the lure to flutter downward, mimicking an injured baitfish.
- Erratic Retrieve: Quickly jerk or twitch the rod while reeling to create erratic movements that can provoke strikes.
Vertical Jigging:
- Drop the lure to the bottom or a specific depth where fish are detected.
- Lift the rod tip sharply and let the lure flutter back down.
- Monitor for strikes, as predatory fish often hit the lure on the drop.
Why This Lure is Effective
- Color Combination:
- The green and yellow hues are especially effective in stained or murky waters and mimic common baitfish species like shad or sardines.
- Flash and Motion:
- The reflective surface and fluttering motion create vibrations and visual cues that attract predatory fish.
- Streamlined Design:
- Allows for long-distance casting and excellent performance in both calm and rough waters.
Pro Tip:
If the water is clear and fish seem hesitant, try varying the retrieve speed or adding a scent attractant to the lure. Also, check the sharpness of the treble hooks, and replace them if necessary to ensure a solid hookset.

Summary
This is a soft plastic lure, likely rigged on a jig head, designed for mimicking baitfish or other prey. Here’s how and where to use it:
How to Use
-
Casting and Retrieval:
- Cast it into the water and allow it to sink to the desired depth (near the bottom, mid-water, or shallow).
- Retrieve it with a steady or variable speed to mimic natural swimming.
- Add occasional pauses or twitches to make it look like an injured or fleeing prey.
-
Dragging Along the Bottom:
- Slowly retrieve the lure along the bottom to stir up sediment and attract bottom-feeding species like redfish, flounder, or grouper.
- Best for species that target prey on the seafloor.
-
Vertical Jigging:
- Drop the lure straight down and bounce it gently up and down, imitating a small creature hopping along the bottom.
- This technique works well for deepwater fishing.
Where to Use
-
Saltwater:
- Inshore flats, near mangroves, or over seagrass beds for species like redfish, trout, or snook.
- Near structures like docks, piers, or reefs for predatory fish.
- Coastal areas with sandy bottoms or rocky edges.
-
Freshwater:
- In lakes, ponds, or rivers for bass, walleye, or pike.
- Near underwater vegetation, fallen logs, or rocky areas where fish might hide.
When to Use
- The reddish and golden color with speckles imitates crustaceans or small fish, making it particularly effective in low-light conditions, murky water, or during dawn and dusk when fish are actively hunting.
This versatile lure can attract a wide variety of predatory fish in different environments.


Summary
This package contains “Donkey Tail” soft plastic paddle tail lures from Mule Fishing. These lures are versatile and designed for multi-species fishing, including bass, crappie, trout, and panfish. Here’s how and where to use them:
How to Use
-
Rigging Options:
- Jig Head: Pair the paddle tail with a small jig head (1/16 oz to 1/4 oz, depending on depth and current). Thread the lure onto the hook, ensuring it sits straight for optimal swimming action.
- Drop Shot: Attach the lure to a drop-shot rig for precise depth control, great for finesse fishing.
- Spinnerbait Trailer: Use it as a trailer on a spinnerbait or chatterbait to add extra action and appeal.
-
Retrieve Techniques:
- Steady Retrieve: Cast the lure and reel it in at a consistent speed. The paddle tail will create a natural swimming motion.
- Bounce Along the Bottom: Let the lure sink to the bottom, then lift your rod tip slightly and let it fall, mimicking a baitfish or small creature.
- Twitch and Pause: Retrieve with intermittent rod twitches to imitate an injured or fleeing baitfish.
-
Finesse Approach:
- Use a slower presentation for pressured fish or during colder water conditions.
Where to Use
-
Freshwater:
- Lakes and Ponds: Around docks, submerged vegetation, or rocky areas.
- Rivers and Streams: In current seams, eddies, or near drop-offs.
- Shallow Flats: For panfish or bass, especially during spawning seasons.
-
Saltwater (Inshore):
- Near seagrass beds, mangroves, or sandy flats for species like redfish, snook, or trout.
Why It’s Effective
- The paddle tail creates vibration and movement, attracting fish through both sight and sound.
- The compact size (70mm) and durable material make it ideal for targeting a wide range of species.
Keep these lures in their original packaging and out of direct sunlight to preserve their durability and stretchiness.

Summary
This is a metal jigging lure, commonly used for saltwater fishing, particularly for species like mackerel, snapper, tuna, or small pelagics. Here’s how and where you can use it:
How to Use
-
Casting and Retrieval:
- Cast the lure into the water near fish-holding areas such as reefs, drop-offs, or bait schools.
- Use a high-speed retrieve to mimic a fleeing baitfish.
- Add erratic jerks during retrieval to create a fluttering motion that attracts predatory fish.
-
Vertical Jigging:
- Drop the lure straight down to the desired depth near the bottom or midwater column.
- Use a jigging motion by lifting your rod tip sharply and then letting the lure fall, imitating a dying fish.
- Experiment with the speed and rhythm to find what triggers bites.
-
Slow Pitch Jigging (Optional):
- Ideal for deepwater areas.
- Use controlled, slow lifts of the rod to let the lure flutter as it sinks.
Where to Use
-
Saltwater:
- Near reefs, wrecks, or underwater structures where fish hunt smaller prey.
- In open water around schools of baitfish or diving seabirds.
- Tidal rips, channels, or drop-offs where predatory fish patrol.
-
Freshwater (less common):
- Can be used in deep lakes or reservoirs for larger predatory fish, like lake trout or pike, mimicking a wounded baitfish.
Summary
Gulp! Alive! baits offer the best alternative to live bait ever produced. Since the baits are soaked in the powerful attractant they are more effective and catch more fish. Put the bait back in the jar to ReCharge its effectiveness. You don’t have to deal with the hassle of live bait anymore try Gulp! Alive! and fish the revolution. Features: – Each bait has a natural presentation in action, scent, and taste – Replaces live minnows for better durability and long lasting results – Expand your strike zone with 400x more scent dispersion than plastic baits – 15 years of Gulp! evolutionthe best keeps getting better Specifications: – Bait Length: 3″ – Color: Assorted – Weight: 11. 20 oz
The Berkley Gulp! Minnow (as shown in your image) is a soft plastic bait designed to mimic the movement and appearance of small baitfish. Here’s how and when to use it:
How to Use the Berkley Gulp! Minnow
-
Rigging:
- Jighead: Attach the minnow to a jighead for casting and vertical jigging. Choose a jighead weight based on water depth and current strength.
- Drop Shot: Use a drop-shot rig for a subtle presentation, especially effective in clear water or when targeting finicky fish.
- Spinnerbait Trailer: Attach it to a spinnerbait or chatterbait as a trailer to add extra movement and scent.
- Texas or Carolina Rig: Use these rigs to target fish near the bottom, especially in weedy or rocky areas.
-
Retrieval Techniques:
- Slow and Steady Retrieve: Mimics a swimming baitfish, ideal for calmer fish that aren’t actively chasing.
- Twitch and Pause: Impart short jerks with pauses to imitate an injured or fleeing baitfish.
- Vertical Jigging: Drop the bait to the desired depth and lift it slightly before letting it fall, perfect for targeting suspended fish.
-
Enhance the Presentation:
- The Berkley Gulp! is infused with scent and flavor that disperses in the water, attracting fish. Be sure to store it in its original packaging to retain these properties.
When to Use the Berkley Gulp! Minnow
-
Target Species:
- Excellent for bass, walleye, crappie, trout, and other predatory species.
- Saltwater varieties can attract species like redfish, flounder, and speckled trout.
-
Conditions:
- Clear Water: The realistic design works well in clear water where fish rely on sight.
- Murky Water: The scent dispersion helps attract fish in low-visibility conditions.
- Cold Water: Fish are less active in colder water, so a slow presentation with this bait can entice them.
-
Season:
- Effective year-round but particularly productive in spring and fall when fish are feeding heavily on baitfish.
-
Situations:
- When fish are being finicky and not responding to hard baits or other lures.
- Around structures like docks, rocks, and weed lines where baitfish gather.
By following these tips, you can maximize the effectiveness of your Berkley Gulp! Minnows and enjoy more productive fishing outings.

Summary
These are squid jigs, specialized lures designed for catching squid. They feature multiple sharp hooks (crown-style) at the bottom and a weighted or luminous body, making them effective in attracting and capturing squid.
How to Use Squid Jigs
-
Attach to the Line:
- Use a swivel to attach the jig to your fishing line to prevent line twist.
-
Fishing Techniques:
- Vertical Jigging:
- Drop the squid jig straight down until it reaches the desired depth, typically near the bottom or where squid are schooling.
- Use an upward jerk or lift-and-fall motion to mimic the movement of a small fish or shrimp.
- Slow Retrieval:
- Cast out the jig and slowly retrieve it while adding small jerks to create lifelike movement.
- Suspending:
- If the water is deep, suspend the jig at a specific depth using a float or multiple jigs to cover different depths.
- Vertical Jigging:
-
Lighting and Attraction:
- These jigs are often glow-in-the-dark or brightly colored to attract squid, especially at night or in murky water. Charge the glow feature with a flashlight before use.
-
Best Practices:
- Keep tension on the line when a squid grabs the jig to prevent it from escaping.
- Be gentle when reeling in, as squid can let go if the tension is inconsistent.
Where to Use
-
Saltwater Locations:
- Harbors and Piers: Squid often gather near light sources at night.
- Coastal Waters: Around kelp beds, rocky reefs, or drop-offs.
- Offshore: Near floating objects or structures where squid feed.
-
Times:
- Nighttime: Squid are most active at night, particularly in areas illuminated by artificial lights.
- Tidal Changes: Squid are more active during incoming tides.
Why These Work
- The hooks are designed to grab the squid’s tentacles securely.
- The jig mimics the size and movement of prey, and the glow feature draws squid in low-light conditions.
These are excellent for targeting species like calamari and other squid varieties commonly used as bait or for cooking!

Summary
This is a spool of Ande Monofilament Fishing Line with a 40-pound test strength, meaning it can handle up to 40 pounds of tension before breaking. It is a clear, general-purpose monofilament line suitable for a variety of fishing applications. Here’s how and where to use it:
Uses of 40-Pound Monofilament Line
-
Saltwater Fishing:
- Ideal for targeting medium to large-sized saltwater species such as:
- Snapper, Grouper, Tarpon, Kingfish, Mahi-Mahi, and other pelagic or reef fish.
- Strong enough to handle the resistance of large fish and the abrasive underwater environments like reefs and rocks.
- Ideal for targeting medium to large-sized saltwater species such as:
-
Freshwater Fishing:
- Suitable for large species such as:
- Catfish, Musky, Sturgeon, or large Striped Bass in freshwater lakes and rivers.
- Suitable for large species such as:
-
Trolling:
- Great for trolling lures or bait offshore for species like Tuna, Marlin, or Wahoo due to its abrasion resistance and high tensile strength.
-
Leader Material:
- Can be used as a leader for lighter lines in situations where fish have sharp teeth or you need additional abrasion resistance, such as for Bluefish or Barracuda.
Characteristics of Monofilament Line
- Stretch:
- Provides shock absorption, making it forgiving during sudden runs or jumps by fish.
- Abrasion Resistance:
- Durable against rough surfaces like rocks, barnacles, or coral.
- Visibility:
- Clear monofilament is less visible underwater, making it effective in clear water conditions.
Best Practices
- Reels:
- Can be spooled onto spinning, baitcasting, or conventional reels depending on the type of fishing.
- Knots:
- Use strong knots like the Palomar Knot or Improved Clinch Knot to secure hooks and lures.
- Conditions:
- Perform well in a variety of conditions but may weaken slightly in direct sunlight over time. Replace periodically to avoid line degradation.

Summary
The spool in the image is Ande Monofilament Leader Material, with an 80-pound test strength and a diameter of 0.90 mm. Leader material is specifically designed to withstand abrasion, stress, and the sharp teeth or rough surfaces you may encounter when fishing. Here’s how and where to use it:
Purpose of Leader Material
-
Abrasion Resistance:
- Protects against rough underwater surfaces such as rocks, coral reefs, and the sharp edges of a fish’s mouth.
- Ideal for species like Barracuda, Grouper, Snapper, Tarpon, or Sharks.
-
Stealth:
- Clear monofilament leader is less visible in water, making it great for line-shy fish in clear water conditions.
-
Shock Absorption:
- Reduces the impact of sudden movements when a fish strikes or makes a strong run.
-
Prevents Line Damage:
- Shields the main fishing line from being cut or frayed during fights with fish.
How to Use Leader Material
-
Attach to Main Line:
- Use a strong knot or connection such as:
- Albright Knot
- Double Uni Knot
- Swivel with a knot for easy attachment/detachment.
- Use a strong knot or connection such as:
-
Length of Leader:
- Typically, use 1-3 feet for inshore fishing or longer (4-10 feet) for offshore fishing.
- Adjust based on the target species and environment.
-
Attach Hook or Lure:
- Tie the leader material directly to the hook, lure, or jig using a knot such as the Improved Clinch Knot or Loop Knot (for better lure action).
-
As a Top Shot:
- Combine with braided or lighter monofilament lines for trolling or bottom fishing setups.
Best Situations for 80-Pound Leader Material
- Saltwater Fishing:
- Perfect for trolling, jigging, or casting inshore or offshore for large fish species.
- Heavy-Cover Environments:
- Excellent in areas with lots of structure (reefs, rocks, wrecks) or sharp-toothed predators.
- Big Game Fishing:
- Commonly used in setups for tuna, sailfish, wahoo, or similar large species.
Tips for Usage
- Storage:
- Keep it in a cool, dry place to prevent UV damage.
- Check for Damage:
- Inspect leader material for nicks or abrasions and replace as needed.
- Pair with Appropriate Tackle:
- Ensure your reel and rod setup matches the strength of the leader.
This material ensures your fishing gear holds up against challenging conditions and strong fish!

Summary
This lure, labeled “Ballyhood,” is a feather trolling lure designed for offshore saltwater fishing. It is particularly effective for targeting fast-moving pelagic gamefish. The green and black coloration, coupled with the feathered skirt, imitates baitfish or squid, making it a versatile and enticing option.
Purpose of the Lure
This trolling lure is commonly used to catch:
- Tuna (Yellowfin, Bluefin, etc.)
- Mahi-Mahi (Dorado)
- Wahoo
- Marlin
- Sailfish
How to Use This Lure
-
Rigging:
- Hook Setup: Rig it with a strong single hook or double-hook rig. Use heavy monofilament or fluorocarbon leaders (80-200 lb test) to prevent cut-offs from toothy fish like Wahoo.
- Bait Option: You can enhance this lure by adding a ballyhoo (rigged natural bait) underneath the skirt for added scent and realism.
-
Trolling:
- Attach the rigged lure to your trolling setup, securing it with a swivel.
- Troll the lure at a moderate speed (6-12 knots), depending on the target species.
- Position it as part of a spread (e.g., in the long or short rigger position) to cover a wide area and create a natural presentation.
-
Adjust for Depth:
- Use trolling weights or planers if you want the lure to run deeper, particularly for species like Wahoo that often strike below the surface.
Where to Use This Lure
- Offshore Waters:
- Ideal for open water, near drop-offs, underwater structures, and seamounts.
- Weed Lines and Floating Debris:
- Troll near weed lines, flotsam, or sargassum mats where baitfish gather.
- Migration Routes:
- Fish along known migratory paths for pelagic species, often near current edges or temperature breaks.
Why It Works
- The feathered skirt produces lifelike movement and visual appeal, simulating a fleeing baitfish.
- The green and black coloration mimics common prey like squid and flying fish, particularly in clear or slightly tinted water.
- The head design allows the lure to create a bubble trail, adding vibration and visibility to attract predators.
Pro Tip: Use this lure during calm to moderately rough conditions. Its streamlined design ensures it performs well without tangling or skipping out of the water. Pair it with a teaser or spreader bar to increase visibility and attract fish from a distance.


Summary
This lure, labeled as “Mean Joe Green” and produced by Cousins Tackle Corporation, is a trolling skirt lure, commonly used in saltwater fishing. Here’s how and where you would use it:
Purpose of the Lure
This lure is designed for targeting pelagic gamefish species, such as:
- Tuna (Yellowfin, Bluefin, etc.)
- Mahi-Mahi (Dorado)
- Wahoo
- Marlin
- Sailfish
Its vibrant colors, glitter, and streamlined design mimic the movement and appearance of baitfish or squid, enticing predatory fish to strike.
How to Use This Lure
-
Rigging:
- Use a strong monofilament or fluorocarbon leader (e.g., 80-150 lb test).
- Rig it with a hook or a hookset, often a single J-hook or a double-hook rig, depending on the species targeted.
- Optionally, pair it with a trolling weight or planer to control depth.
-
Trolling:
- Attach the rigged lure to your main line via a snap swivel.
- Troll the lure behind the boat at varying distances (generally 10-30 feet behind) to create the illusion of fleeing prey.
- Adjust trolling speed based on your target species:
- Wahoo: Faster speeds (10-15 knots)
- Tuna or Mahi-Mahi: Moderate speeds (6-10 knots)
- Marlin or Sailfish: Slower speeds (4-8 knots)
-
Spread Setup:
- Use it as part of a trolling spread, mixing different lures and baits to increase attraction.
- Position the “Mean Joe Green” in the outrigger or as a flat line lure for maximum visibility.
Where to Use This Lure
This type of trolling skirt is versatile and effective in various saltwater environments:
- Offshore Fishing:
- Over deep water, near structures such as drop-offs, seamounts, and underwater canyons where pelagic fish hunt.
- Around Floating Debris or Weed Lines:
- Fish often gather near floating objects and sargassum weed lines.
- During Migration Seasons:
- When pelagic species are moving through a region, this lure is perfect for targeting them.
Why It Works
- The green and black coloration resembles squid or small baitfish, a favorite prey for many pelagic fish.
- The soft skirt moves naturally in the water, mimicking the undulating motion of prey.
- The design minimizes drag, allowing for smooth trolling.
Pro Tip: Use it with a teaser or daisy chain to create more commotion in the water, further attracting gamefish to the area.

Summary
This is a metal spoon lure, commonly referred to as a “casting spoon” or “jigging spoon.” It is versatile and effective for both saltwater and freshwater fishing, designed to mimic the appearance and erratic movement of a small baitfish, which is attractive to predatory fish.
How to Use This Lure
Casting and Retrieval:
- Attach to Line:
- Use a strong swivel or loop knot to reduce line twist caused by the spinning action of the lure.
- Casting:
- Cast the lure out and allow it to sink to the desired depth (depending on the target fish species).
- Retrieve:
- Use a steady or erratic retrieval method to make the spoon dart and flutter, simulating an injured baitfish.
- Add pauses during retrieval to let the spoon sink and flutter, which can trigger strikes from opportunistic fish.
Vertical Jigging:
- Drop the spoon to the bottom or the depth where fish are detected.
- Jig it vertically by lifting your rod tip sharply and letting the spoon fall back, allowing it to flutter.
- Repeat the process while monitoring for strikes during the fall, as many fish hit the lure at this point.
Where to Use This Lure
Freshwater Applications:
- Target Species:
- Pike, Bass, Walleye, Trout
- Ideal Locations:
- Near weed beds, rocky structures, drop-offs, or deeper areas where predatory fish hunt.
Saltwater Applications:
- Target Species:
- Bluefish, Striped Bass, Mackerel, Redfish, Snook
- Ideal Locations:
- Near jetties, reefs, or open water where baitfish schools are present.
- Effective for surf casting or nearshore fishing.
Why It Works
- The metallic finish reflects light, mimicking the flash of a fleeing baitfish.
- The heavyweight design allows for long casts, deep sinking, and effective presentation in strong currents or deep water.
- The erratic fluttering action when retrieved or jigged triggers predatory instincts.
Pro Tip: Maintain sharp hooks, as fish often strike spoons aggressively but may not stay hooked if the treble hooks are dull. Consider upgrading the hooks for stronger saltwater-resistant ones if you’re targeting larger species.

Summary
This is another metal spoon lure with a streamlined design and a two-tone green and yellow color scheme. It’s similar to the previous spoon lure but offers a different color pattern that can be particularly effective in specific conditions and for certain species of fish.
Fire 3 Purpose
The term “Fire 3” on this metal spoon lure likely represents a specific color or design pattern used by the manufacturer. Many fishing lure companies label their lures with names or codes that correspond to particular color schemes or finishes. In this case:
-
“Fire” could refer to a bright, flashy, or bold color scheme, possibly imitating the hues of fire or heat (like reds, yellows, or oranges). It might also suggest that the lure is designed to be highly visible in certain water conditions.
-
“3” could denote the third variation in a series of similar designs or sizes. Manufacturers often release multiple patterns or models, and the number helps differentiate them.
Why It’s Important
- Color/Pattern Relevance: Some patterns or colors are more effective for specific fish species or water conditions. For example, bright “fire”-type colors might be better in murky water or overcast conditions where visibility is low.
- Size Identification: If “3” refers to the size of the lure, it helps anglers select the appropriate size for the fish they’re targeting (smaller sizes for smaller species and larger sizes for big game fish).
If you want to confirm its exact meaning, checking with the manufacturer’s catalog or website could provide more detailed information.
Where to Use This Lure
Freshwater Applications:
- Target Species:
- Pike, Bass, Walleye, Trout, Muskie
- Ideal Locations:
- Lakes, rivers, or reservoirs with underwater structures like logs, rocks, or weed beds.
- Deep water during colder months where fish tend to hold lower.
Saltwater Applications:
- Target Species:
- Mackerel, Bluefish, Striped Bass, Redfish
- Ideal Locations:
- Coastal waters, surf zones, or jetties.
- Effective for nearshore reefs and sandbars.
How to Use This Lure
Casting and Retrieval:
- Attach to Line:
- Use a swivel or loop knot to minimize line twist caused by the spinning action.
- Casting:
- Cast the lure into areas where fish are feeding or hiding, such as near drop-offs, weed beds, or baitfish schools.
- Retrieve Techniques:
- Steady Retrieve: Maintain a consistent speed to make the lure swim naturally.
- Stop-and-Go Retrieve: Pause occasionally during retrieval to allow the lure to flutter downward, mimicking an injured baitfish.
- Erratic Retrieve: Quickly jerk or twitch the rod while reeling to create erratic movements that can provoke strikes.
Vertical Jigging:
- Drop the lure to the bottom or a specific depth where fish are detected.
- Lift the rod tip sharply and let the lure flutter back down.
- Monitor for strikes, as predatory fish often hit the lure on the drop.
Why This Lure is Effective
- Color Combination:
- The green and yellow hues are especially effective in stained or murky waters and mimic common baitfish species like shad or sardines.
- Flash and Motion:
- The reflective surface and fluttering motion create vibrations and visual cues that attract predatory fish.
- Streamlined Design:
- Allows for long-distance casting and excellent performance in both calm and rough waters.
Pro Tip:
If the water is clear and fish seem hesitant, try varying the retrieve speed or adding a scent attractant to the lure. Also, check the sharpness of the treble hooks, and replace them if necessary to ensure a solid hookset.

Hey! I simply want to give a huge thumbs up for the great information you may have right here on this post. I will likely be coming again to your weblog for extra soon.
Thanks for the kind words
some genuinely interesting info , well written and broadly speaking user friendly.
Would you be all for exchanging hyperlinks?
What are you offering in exchange?